- JWT
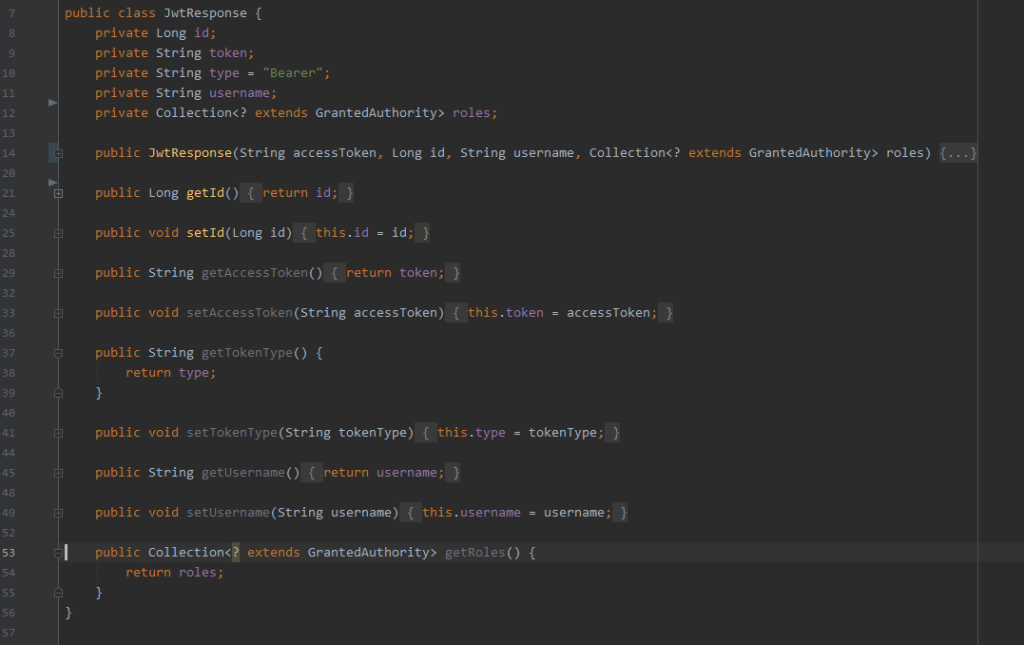
- Tạo file JwtRespone như sau:
- JwtService
@Service

public class JwtService {

    private static final String SECRET_KEY = "11111111111111111111111111111111";

    private static final long EXPIRE_TIME = 86400000000L;

    private static final Logger logger = LoggerFactory.getLogger(JwtService.class.getName());


    public String generateTokenLogin(Authentication authentication) {

        UserPrinciple userPrincipal = (UserPrinciple) authentication.getPrincipal();


        return Jwts.builder()

                .setSubject((userPrincipal.getUsername()))

                .setIssuedAt(new Date())

                 .setExpiration(new Date((new Date()).getTime() + EXPIRE_TIME * 1000))

                .signWith(SignatureAlgorithm.HS512, SECRET_KEY)

                .compact();

    }


    public boolean validateJwtToken(String authToken) {

        try {

            Jwts.parser().setSigningKey(SECRET_KEY).parseClaimsJws(authToken);

            return true;

        } catch (SignatureException e) {

            logger.error("Invalid JWT signature -> Message: {} ", e);

        } catch (MalformedJwtException e) {

            logger.error("Invalid JWT token -> Message: {}", e);

        } catch (ExpiredJwtException e) {

            logger.error("Expired JWT token -> Message: {}", e);

        } catch (UnsupportedJwtException e) {

            logger.error("Unsupported JWT token -> Message: {}", e);

        } catch (IllegalArgumentException e) {

            logger.error("JWT claims string is empty -> Message: {}", e);

        }


        return false;

    }


    public String getUserNameFromJwtToken(String token) {


        String userName = Jwts.parser()

                .setSigningKey(SECRET_KEY)

                .parseClaimsJws(token)

                .getBody().getSubject();

        return userName;

    }

}- Cấu hình và phân quyền:
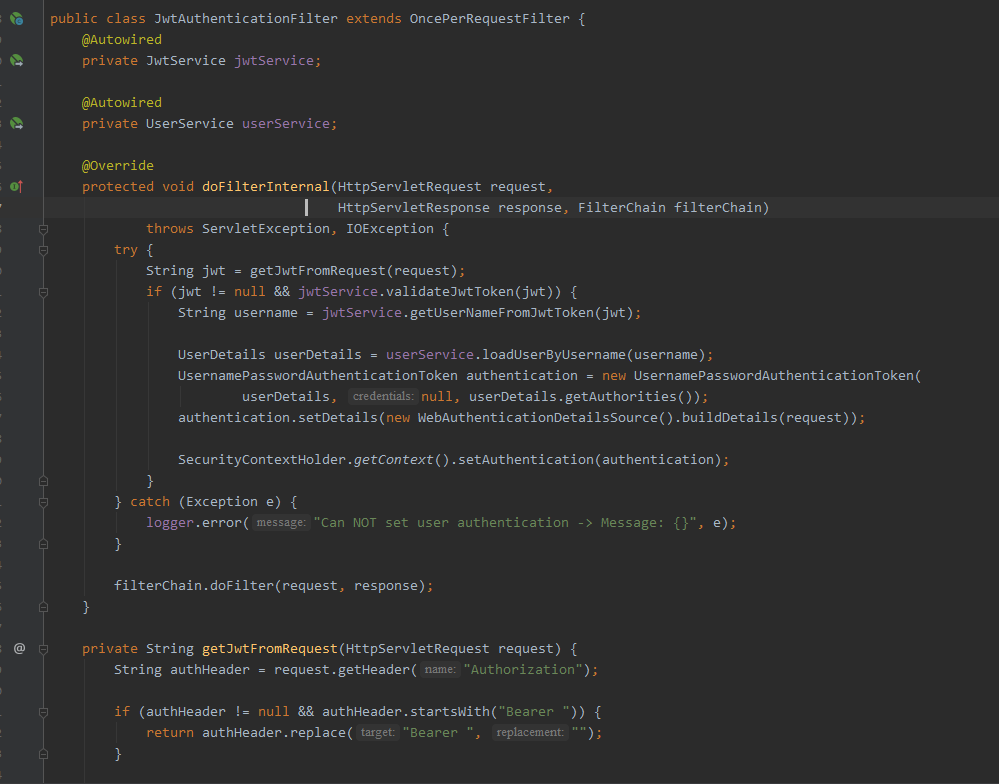
- JwtAuthenticationFilter:

- SecurityConfig:
-          @Configuration

@EnableWebSecurity

public class SecurityConfig extends WebSecurityConfigurerAdapter {

    @Bean

    public UserService userService() {

        return new UserServiceImpl();

    }


    @Autowired

    private UserService userService;


    @Bean

    public JwtAuthenticationFilter jwtAuthenticationFilter() {

        return new JwtAuthenticationFilter();

    }


    @Bean(BeanIds.AUTHENTICATION_MANAGER)

    @Override

    public AuthenticationManager authenticationManager() throws Exception {

        return super.authenticationManager();

    }


    @Bean

    public PasswordEncoder passwordEncoder() {

        return new BCryptPasswordEncoder(10);

    }


    @Autowired

    public void configureGlobalSecurity(AuthenticationManagerBuilder auth) throws Exception {

        auth.userDetailsService(userService).passwordEncoder(passwordEncoder());

    }


    @Override

    protected void configure(HttpSecurity http) throws Exception {

        http.csrf().ignoringAntMatchers("/**");

        http.authorizeRequests()

                .antMatchers("/",

                        "/login").permitAll()

                .anyRequest().authenticated()

                .and().csrf().disable()

                .logout().logoutRequestMatcher(new AntPathRequestMatcher("/logout"));

        http.addFilterBefore(jwtAuthenticationFilter(), UsernamePasswordAuthenticationFilter.class);

        http.sessionManagement()

                .sessionCreationPolicy(SessionCreationPolicy.STATELESS);

        http.cors();

    }
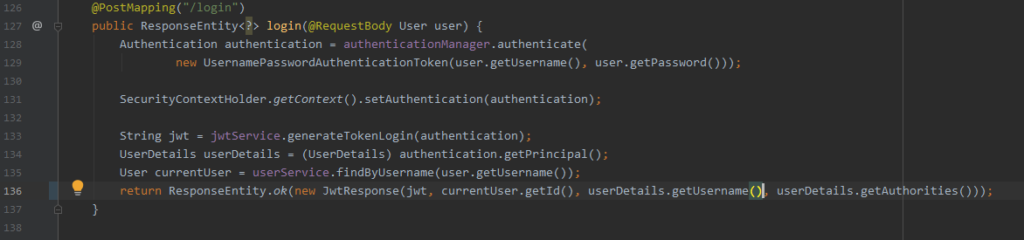
}- Tạo controller
- Chạy thử:
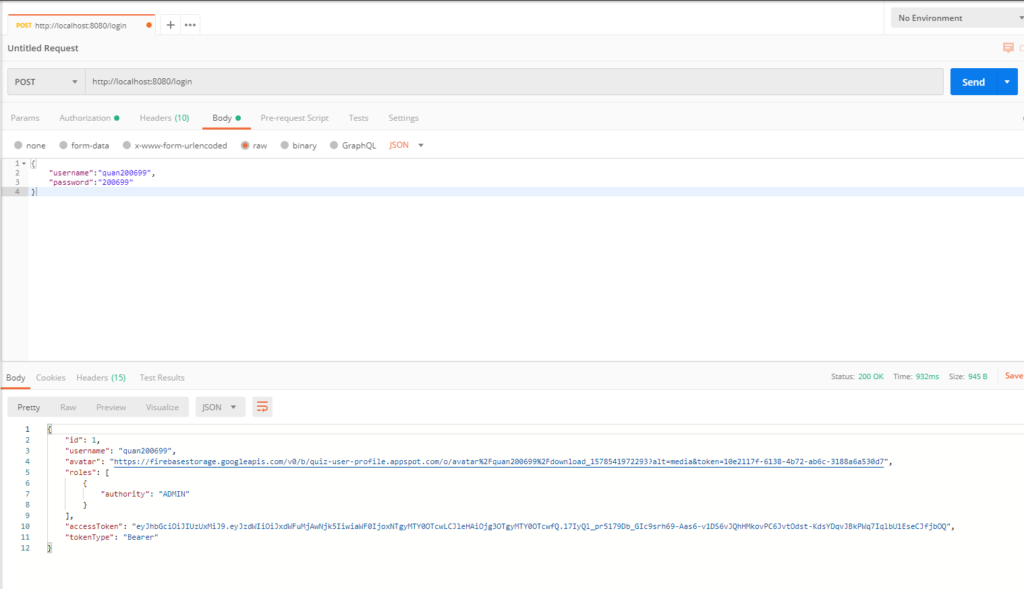
- Khi ứng dụng được chạy chúng ta bật postman lên rồi gửi request tới địa chỉ http://localhost:8080/login
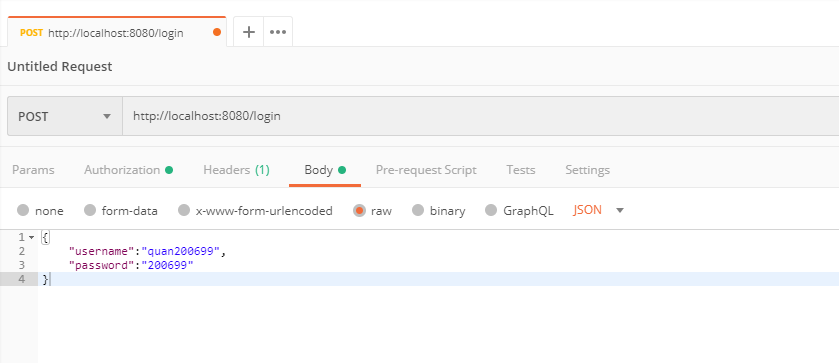
- Sau đó chúng ta nhấn send để lấy về mã jwt
- Để truy cập được những trang web có bảo mật chúng ta cần copy đoạn access token trả về và làm như trong ảnh
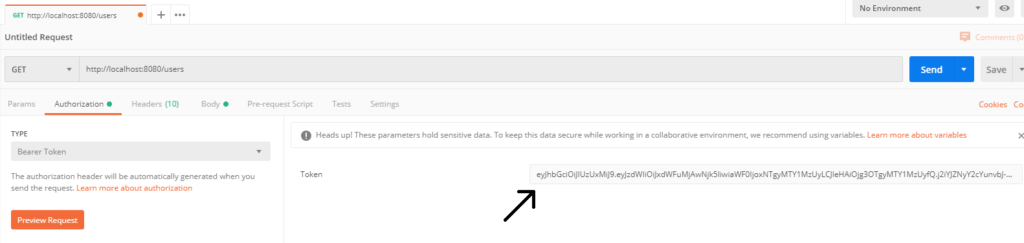
- Và sau đó ấn nút send để gửi lại request sau khi được thêm mã token
Author: Nguyễn Minh Quân
Đăng ký nhận bộ 150 thuật ngữ tiếng Anh chuyên ngành IT tại đây
Tìm hiểu thêm về mô hình đào tạo Coding Bootcamp tại đây


0 Lời bình